
In today’s episode, learn How to Retouch a Dramatic Male Headshot in Photoshop! Fix blemishes and redness, and add classic color styling to your photographs!
(Come ritoccare una drammatica Headshot maschio in Photoshop)
Blemishes & Imperfections
To begin, use the healing brush tool to clean up small imperfections on the skin. Sample points that have a desirable texture and then paint over the unwanted spots. We recommend keeping permanent aspects of the face in the image, such as moles and scars in some cases.
Redness
Color variation is very common is people’s skin, and it’s usually just a slight red tone that needs to be fixed. To target that skin tone, create a new hue/saturation layer and change the menu from Master to Reds. Crank the hue and saturation up to a crazy bright color (we go for green). You should see the red blotchiness of the skin showing through as a different color. Now, slide the bottom slider so that it fills in those areas with green. Then, change the hue and saturation to zero and slowly drag the hue slider to counteract the red.
Style
Time to add some subtle glow! Create a new Levels Layer. For a nice stylized look, select different channels and slide the black levels slider to the left. It will brighten and color the blacks in the image.
Next, put an inverse mask over the layer so that it’s invisible. Select the gradient tool and paint white from the center of the image. A glow will show up from your levels layer. You can mask out the glow over the subject as well.
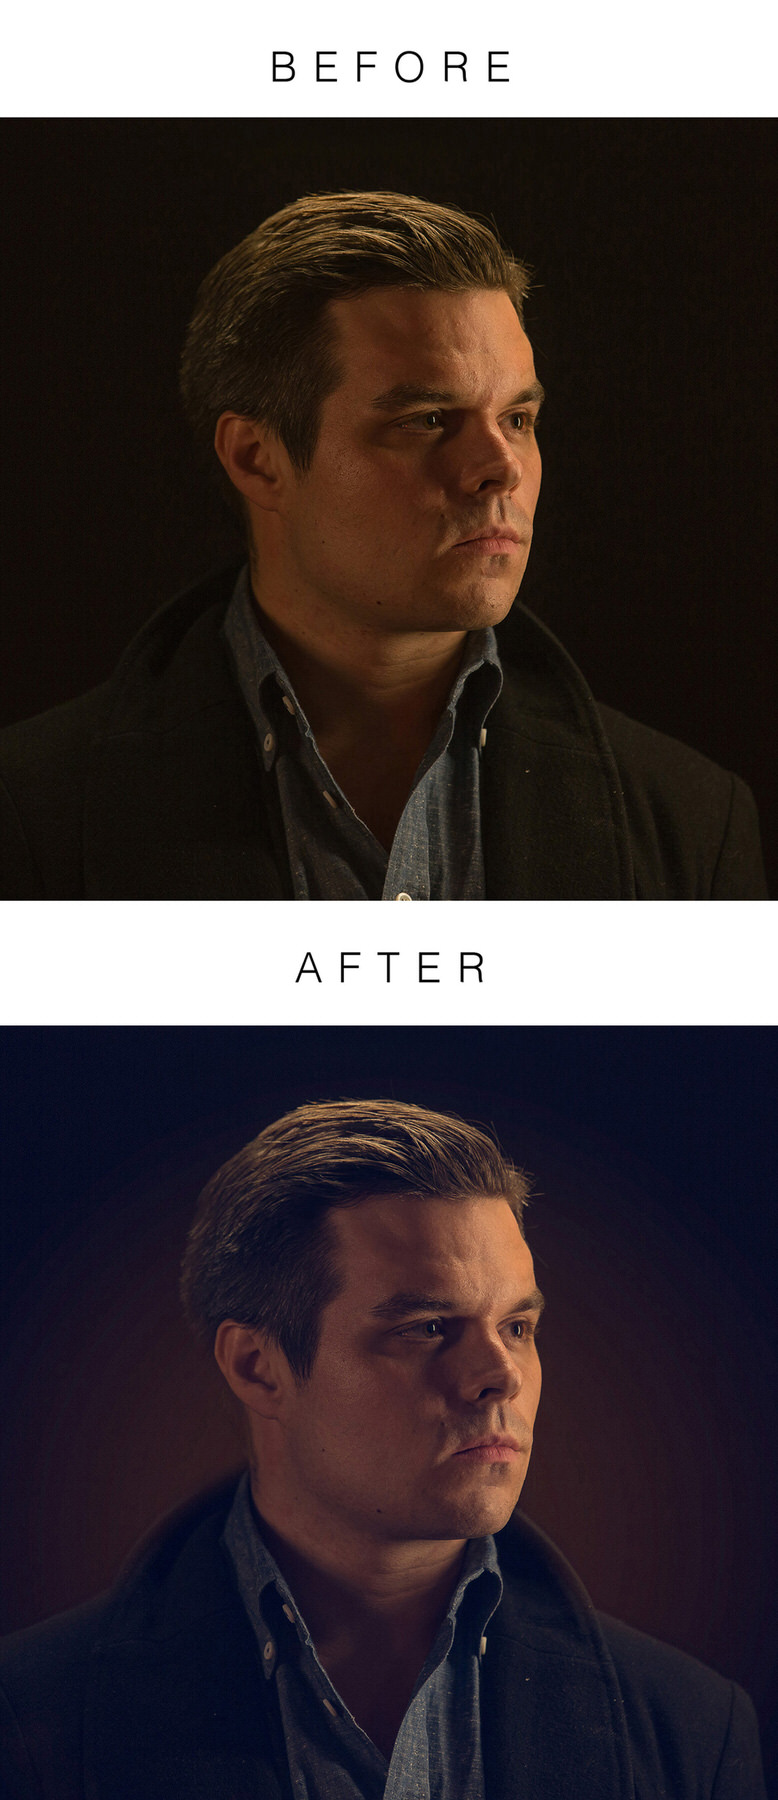
As you can see, the final result is refined compared to the first image. The skin has been cleaned up a bit and there is no redness to be found. The slightly blue shadows and yellow highlights compliment each other well. The subject no longer blends into the background so much. He’s ready for his close up!
(Come ritoccare una drammatica Headshot maschio in Photoshop)
Blemishes & Imperfections
To begin, use the healing brush tool to clean up small imperfections on the skin. Sample points that have a desirable texture and then paint over the unwanted spots. We recommend keeping permanent aspects of the face in the image, such as moles and scars in some cases.
Redness
Color variation is very common is people’s skin, and it’s usually just a slight red tone that needs to be fixed. To target that skin tone, create a new hue/saturation layer and change the menu from Master to Reds. Crank the hue and saturation up to a crazy bright color (we go for green). You should see the red blotchiness of the skin showing through as a different color. Now, slide the bottom slider so that it fills in those areas with green. Then, change the hue and saturation to zero and slowly drag the hue slider to counteract the red.
Style
Time to add some subtle glow! Create a new Levels Layer. For a nice stylized look, select different channels and slide the black levels slider to the left. It will brighten and color the blacks in the image.
Next, put an inverse mask over the layer so that it’s invisible. Select the gradient tool and paint white from the center of the image. A glow will show up from your levels layer. You can mask out the glow over the subject as well.
As you can see, the final result is refined compared to the first image. The skin has been cleaned up a bit and there is no redness to be found. The slightly blue shadows and yellow highlights compliment each other well. The subject no longer blends into the background so much. He’s ready for his close up!


